Showing posts with label DIY. Show all posts

Monday, January 12, 2015

DIY-{Chalkboard Paint Pots}

Time for a cheap, easy DIY.  Who has time for more?  Or patience?  Nah.

I mentioned here last week that I wanted to get more plants in the house.  They are supposed to be good for allergies and making the air fresher (I'm so technical).

So here are the victims.


You will also need Chalkboard paint (this can will last you forever), spongy paint brushes and chalk.


 Take you plant, put it in a bowl and whip the plastic pot off.  
Yes, we are painting this little flimsy pot. 


Put one coat of the chalkboard paint on the pot.  Then don't wait 6 hours like you should.  
It's like nail polish. Just put the second coat on.  


Let them dry.


Look at these gems!


Attention professional chalk drawers: look away.
Time to decorate.  Name them, write the watering directions on them, etc.


 Now find a home for your fancy plants!  You don't need to buy pots when you can just paint them. :)


On a little tray in the kitchen


I might have stopped in the dollar spot and found this silver container with rope handles.  
Rope handles people.  swoon.
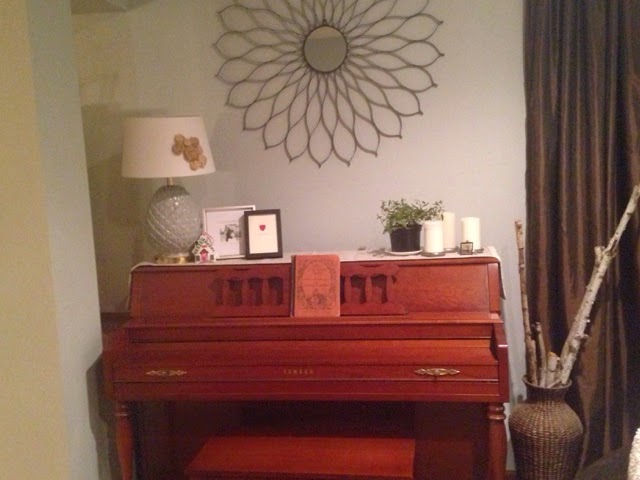


On the piano


If you are inspired by now being a gardener, 
you might like theses new sets of earrings from the shop!

 
Get them here


Get them here

Get them here

What do you think?  Will you try this?
Have a good day!
:) Katie

Monday, January 5, 2015

DIY Glitter Deer


Thought I would start doing some more simple DIY projects on the blog.  I 'm always wanting to do DIY projects at home.  I look for simple things to do too. So, I'll try to do one a week!  I have a DIY board on Pinterest, so you can find some of the things I do here.

After I take my Christmas decorations down, I have some empty frames that need filling.  So I looked on Pinterest and found tons of free printables.  Anything you can imagine.  I saw this little guy and thought it would be perfect. But he needed something else

I used a small stolen paint brush from Ella, Tiger Eye glitter (any color you want) from Martha Stewart and Mod Podge (or any glue you have on hand)(not pictured).

Doesn't this look so professional with the child's paintbrush?


I took the glue and just spread a thin layer around the picture. I did want crisp lines so I took a little bit of time on the edges.  A little too much because I had to go back in and add more glue because it started to dry.  Brilliant.


Next take your glitter and shake it all over the picture.  You will have excess, so try to bend the picture and shimmy the glitter around.  You might have to add more glue, but it doesn't matter if it gets mixed up with the glue because it will dry clear.  You might need to shake it off....


Now set it to dry.  
Then hope you have a friend as nice as my sweetie girl Leah and grab the frame her handy hubs made for me.  For her to give me.  You get the driftwood.  I'm done.
Isn't it gorgeous?


Once it's dry, it will look wrinkled at first, but after pressed into the glass, it flattens out. 


Success!  Let me know if you want more of these little DIY's. 
:) Katie

Friday, September 26, 2014

DIY-Frame a bag

I was walking around a craft store the other day.  That sounds like a joke.
I took a little turn down the clearance aisle and found this cute little bag.  I knew what I was going to do with it right when I got it...for .90.  Scrore!


I cut it to fit inside this frame and now have a little cute new picture!


That's the kind of DIY I like!


Tuesday, September 2, 2014

Just dye it!

Yup. I dyed my bathing suit. 

I ordered the most beautiful bathing suit for a vacation coming up. This is her.


A little hard to see but it is a beautiful rose color. Also an almost exact match to the color of my skin. Not that my skin is a beautiful rose color. 

That's not good. It just looked like I had ruffled skin.

Oh and it was final sale.
So I googled how to dye a bathing suit. And I'm not the only one!! There was a ton of info on how to fix a screw-up!

Joann's sells this gem called iDye Poly You can't dye polyester. Just doesn't happen. The item just laughs the dye off. Unless you buy this. And I bought 2. 


Follow the simple directions, cross your fingers, and just hope this hot mess idea works. 

It did!


It came out a beautiful hunter green.  Now to get rid of the plastic dye smell. But let's just pretend it smells like the rose color it used to look like. :)
 

Thursday, July 10, 2014

Little pink desk

Did you know you can sit down to put your make-up on? Yeah. It's pretty pleasant. I did it when I went to visit my love. Pictured here after I put my face on while sitting down. 


So when I got home from visiting, I went on the hunt for a little vanity-type desk/table. 
Did you know that people that post on craigslist don't actually want to sell their stuff? Yeah. Crazy right? They just post it and don't answer their emails. 
So I went to good old GW and found my little friend.  The sewing table.

(Stop spray-painting in the basement! He said)

And we were off. I wanted a dusty rose but Krylon doesn't work like that.  And Im not a patient painter. So light pink it is.
By now you know this is not a photography blog.


I ignored the laundry some more and decorated her. 


Now leave me alone while I put on ma face!


Wednesday, April 24, 2013

DIY scrabble picture frame

I posted a pic of me and E on Instagram (I'm Trixiegirlaccessories on Instagram).  It was just of us in the car when we were doing some birthday shopping for the hubs.  I had a friend, Corie, say we should frame it and give it to him.  Well duh!  Thanks Cor.  Because I did!

I printed the pic (well Walgreens did) and picked up a frame at Target.


But because I can't leave things alone,  I thought of this!  I picked out the phrase "we love u" from a Scrabble game that I got at a garage sale in the summer.  I put some hot glue on the back of each letter to glue it to the "tile holder?"  I don't buy Scrabble to play.  I buy Scrabble to craft.


Then I sat the picture up as it would normally stand.  I put a strip of hot glue along the base of the scrabble stand where it met the frame.  Once it dried, I did another strip just to reinforce the glue.

And Voila.  You can do this for anyone!  What a great present.  I think it would make a cute new home present with a picture of someone's new house!
Just look for scrabble games at Goodwill, garage sales or if you don't like either, then you can just borrow a Scrabble game from a neighbor....;)


Sunday, April 14, 2013

Easy scarf DIY

Are you a scarf person? I am, but don't love spending $$$ on them.  I saw this scarf at the Dollar Tree today. I didn't like that is was so thin. So I bought two to bulk it up. Of each kind...:)


Tie the ends together to make one long scarf. *actual size is hula hoopish


Wrap it around 3 times. Pin it underneath with a couple of safely pins to hold to in place. That's my favorite scarf trick. I can't stand when you have to wrestle with your scarf all day! Ain't nobody got time for that!
Here's your soon-to- be $2 scarf!

Have a good Sunday!


Tuesday, March 12, 2013

5 thrifting tips


It's no secret that I love a thrift store.  Thrift store, consignment store, garage sale, estate sale.  It's all heart-racing fun to me.  I love finding uses for things other than their intended purpose.  And as I get older I love the sentimental piece of items more.  Especially from my own family.  Knowing that I have something that has been used and loved in my families past makes my heart smile. 

I think it's funny when my friends say "I want to go with you shopping sometime" or "what stores do you shop at to find all of this stuff?"  Secret reveal: anywhere and everywhere.  Astonishing I know.  But here are a few tips to help you out if you don't want to take me.  I can talk a lot and am overwhelming even to myself at times.  ;)

1.  Never give up.  Dora knows best.  Just because you don't find what you are looking for doesn't mean it's not out there.  It will take time to find things you are looking for.  It took me 2 years for these babies:


2.  Know your local stores and their sale schedule.  It's not complicated and can help you score things you might find at a better price!  And if you go with your mother-in-law she will get you her senior discount!  xo Mom K!  And if you are garage-saling, don't be afraid to ask for a bundle deal or a lower price.  Just don't insult them.  ;)

 
3. Think outside of the box.  If you like a piece that you find, but maybe don't like something about it, it can be changed.  A color, a button, a style etc.  Change it!  Remember this $4 smelly school desk?  A little sunshine and spraypaint is all it took.


4. Go alone.  Though a good garage-saling friend is a great thing to have, I think doing stores is great alone, thinking time!  With a coffee.


5. Don't be grossed out.  Things can be cleaned, sanded, washed.  Wash it twice if it makes you feel better!   And a lot of times things come straight from the store.  So it's just like getting a really good sale.  Some times they come from  places that rhyme with Target. 

6.  Free extra tip!  Tell people that like to shop, what you are looking for.  Like my MIL.  She knows that I love ribbon, lace and buttons.  She loves to garage sale, and picks stuff up all the time for me!  The lace that I use for my lace collection came from her.


  Hope this gives you a little push to go find some great stuff! 

Monday, October 29, 2012

Day 29: Fabric acorns

So maybe some of you get magazines in the mail.  Maybe some of you get your secret amazon orders...;)
 I get this:


You know have a problem when you get excited that your parents have sent you a box of acorn tops thru the mail.  I'm sure we have them here in MN, but it's funnier now that I know how they were collected.  My mom and her friend would stuff them in their pockets when they walked in the morning.  lol.  Hope this does you proud mom!  :)

I had found this cute blog and they had done this little craft. 

From DIY Louisville (click for how-to pics)

You need:  acorn top, small fabric circle sized according to how large or small your acorn top is, needle, thread, stuffing, hot glue gun
Sew a running stitch around your circle, stuff with stuffing, pull thread to cinch closed and knot, use hot glue around the entire acorn top, attach.  For the burlap, I didn’t sew the top at all.  I simply filled the circle with stuffing, pinched everything tight, and glued the acorn top in place.
Here is the final result of the couple that I did.  I didn't sew them at all.  I just twisted, smashed and glued. I think they would be super cute on the T-Day table!  I also think they look like macaroons....;)


I love me some squishy acorns.


Sunday, October 28, 2012

Day 28: Cresent roll mummies

I'm about to share something with you all.

When this comes out of the oven at Christmas, you better be next to the oven ready or you won't get any. They are that hot...as in the "it" appetizer. We don't make them look like mummies though, no time for fooling around when it comes to these.

You will need cocktail weenies (or a vegetarian alternative), dough and mustard.

Unroll and take a long strip of cresent dough and wrap the weenie to look like a mummie.

If you don't want the mummy look, just cut triangles out and wrap away.

Super hard right!

You can then add little dots of mustard for eyes if you want. Or have a bowl of mustard on the side for double dipping.


( Source )


Friday, October 26, 2012

Day 26: DIY sharpie mug

I found this idea on Pinterst and it lead back to one of my favorite blogs, A Beautiful Mess.
It's a blog written by 2 sisters.
And it's awesome.
 

I can't draw. So just expect that below. :)
 
I have some fav mugs from the Dollar Tree. White, simple, unexpecting...whahaha
It didn't see the sharpie coming.


Hello new "Cup 'O Wakey"!

Put it on a baking sheet for 30 minutes at 350 degrees.
And while you are waiting 30 minutes for your mug to come out of the oven...
open the package of Trader Joes Dark Chocolate and Peanut Butter Cupcakes.

Hand wash your mug! And hope it doesn't come off, heehee.


Adsense